Snowshoeing is a great winter activity for non-skiers and anyone who wants to enjoy winter landscapes at a slower pace. Happily Switzerland has many official snowshoe trails that have relatively low avalanche risk and avoid protected nature reserves. Although winter walks on groomed trails are also nice, snowshoeing has the advantage of much better traction while walking and the ability to explore in deeper snow.
Here is my guide to snowshoeing in Switzerland with suggested trails for beginners, what equipment to buy, what to wear, etc. Happy snowshoeing!
Contents
What is a snowshoe trail
Although snowshoes allow you to walk wherever you want, Switzerland has many sign-posted snowshoe routes that are intended for people walking with snowshoes. These routes are marked with pink poles in the snow, so you can see where to walk even if no one has trampled the snow yet. Unlike winter hiking trails, the snow is not groomed by machines.
These sign-posted routes are planned so they are safe from dangerous terrain like cliffs and high avalanche risk areas. Local authorities typically monitor the snow situation near snowshoe routes and will close trails when there is high safety risk (usually avalanche). Snowshoe trails are sometimes rated by difficulty (blue, red, black), which is defined by the incline and slope of the terrain.

How to find a snowshoe trail in Switzerland
Some snowshoe routes are publicized and hiking websites like Switzerland Mobility and Schweizer Wanderwege. This is a good place to start, but many ski resorts have snowshoe trails that do not appear on these websites. So look at the website for the ski resort you plan to visit, which usually has a page detailing the snowshoe routes.
The ski resort winter maps usually show the snowshoe trails as a pink dotted or dashed line and winter hiking trails (groomed snow) as a pink solid or dashed line. But there is no standard notation for these trails in Switzerland, so check the map key. The trail icon is usually more helpful, showing whether the hiking person has snowshoes or not.

When you start snowshoeing, I suggest picking a trail that is rather short (3-5 km) and not too much elevation gain (under 200m). Even if you are used to hiking more difficult trails, snowshoeing takes a bit longer and more effort than hiking the same trail. So start with trails you would find easy as a summer trail.
Start with my list of Swiss Snowshoe Trails for Beginners.
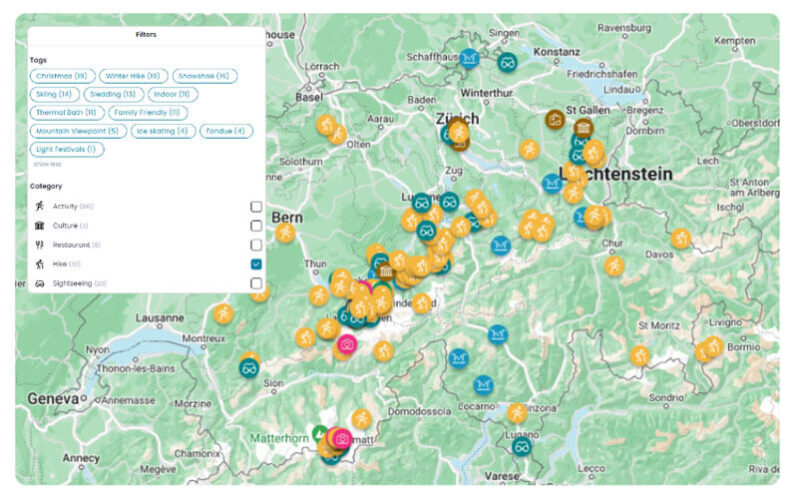
Map of Swiss snowshoe trails
Here are the snowshoe trails we’ve reviewed on our site. Click on the marker for a summary and link to trail info. See list of all snowshoe hikes.
Snowshoe equipment
Renting snowshoes
Snowshoes can be quite expensive to buy, especially in Switzerland. So I recommend starting by renting snowshoes and going for a trial hike. Snowshoes are relatively inexpensive to rent and are available in most winter sport rental shops. In Switzerland, Migros SportXX is one of the most affordable at CHF 11/day. Poles are usually priced separately, about CHF 5/day.
Some small ski resorts rent snowshoes directly at the ticket office. For example, Fürenalp rents snowshoes with poles for only CHF 8 (also in children’s sizes). At large resorts, snowshoe rental at sport sport is often quite expensive, running up to CHF 20-25/day. So check the prices on the various websites before heading out. Not all shops carry child’s sizes (under shoe size 35), so you may want to call ahead.
It’s also good to know that you can usually rent equipment the day before, starting around noon. So you don’t have to go in the evening when the shop is busy or the morning before your adventure.
Buying snowshoes
Shopping for snowshoeing isn’t as complicated as it might seem. Unless you are climbing steep mountains in deep snow or doing specialized sports like winter trail running, you need what’s called a “rolling terrain” snowshoe, which can handle hiking on and off trail, with moderate slopes. Some shops sell kits with both snowshoes and poles, which can be a good deal.
In Switzerland (and elsewhere), the common brands are MSR and Tubbs. Here are a few models I’d suggest.
MSR Lightning Trail (blue in below pic) – This is the model I bought for our family because they were highly rated and on sale (I got them for CHF 220 during Ochsner Sport annual Dec sale). In several reviews I read, they were praised for being lightweight and having a good balance between flotation (displacing enough snow) and stride ergonomics (narrow enough that walking isn’t awkward). We bought size 22 for myself and my 13 year old (we both wear shoes sized 39) and size 25 for my husband and 16 year old (who have shoes sized 42-44).
These are quite expensive at around CHF 330. But you can often find them on sale, like at Berg-Freunde.ch. We bought ours during Ochsner Sports annual winter sale in Dec 2020 for CHF 220.
One thing I like about the MSR Lightning models is that you can buy an extension for deep snow that attaches to the back, displacing more snow if necessary. You can also easily and cheaply buy replacement straps if they break.

MSR Lightning Ascent (red in above pic) – very similar to Lightning Trail but it has a netted binding that some people say is more comfortable and works with softer shoes, but also a bit more complicated to use. Usually sell for around CHF 350. Search for MSR Lightning Ascent.
MSR Evo Trail (red in below pic) – Very popular and more affordable all-rounder MSR model, usually around CHF 240 (often including poles). Some say the plastic body is a little noisy and they are bit short for deep snow. But generally people find them easy to use and comfortable. Search for MSR Evo Trail.

Tubb Flex VRT (yellow in above pic) – People like these because they are light and narrow, making them easy to walk in. But the smaller profile means they displace slightly less snow. For most casual snowshoe hikes, this probably isn’t a big problem. They also use a Boa binding (like a snowboard boot), which is simpler to use but more difficult to replace if it breaks.
This model is usually available at Ochsner Sport and other sport outlets but they are currently sold out and not even listing them online. Galaxus lists them for CHF 346 but currently sold out.
Decathlon usually sells less expensive snowshoes, but they are currently sold out and not listing any models on their website.
Snowshoes for kids
It can be a little difficult to find snowshoes for children, with feet under size 35. Here are a few models I found in Switzerland.
For younger children, the nicest option I’ve found in Switzerland is the Tubbs Flex Junior (CHF 145 on Galaxus or CHF 109 on Campz.ch), which is suitable for children aged about 6-10, max weight 41 kg. Unlike other junior snowshoes, this has all metal spikes and is constructed more similar to an adult version, meaning higher quality.

MSR sells the Tyker model (green below) for kids accommodating shoe size 24-35 (selling for CHF 79 on Brach.ch). The description says “robust snowshoe” but the spiky underneath the shoe are mostly plastic.
Decathalon sells the TSL Tuktu for CHF 45 (yellow below), which looks a bit flimsy, though it is made by reputable snowshoe brand. It might be a good starter model to get little kids excited.

Hiking sticks
I highly recommend bringing hiking poles while snowshoeing. I’ve gone without poles and it’s ok when the terrain is flat and trampled snow. But with any lumps or hills, I often felt unbalanced, especially going downhill. Poles are also helpful if you fall over in deep snow and need some leverage to stand up. Snowshoeing without poles doesn’t seem to bother my kids, so use your best judgement.
You can use your summer hiking poles, but it would be best to add snow basket attachments so they don’t sink deep into the snow. Most sport stores sell these attachments. Just take your poles with you to the store and as the sales staff to help you. Many people use non-collapsing ski poles, which also works well.
As an example, below are inexpensive collapsing poles (CHF 16/pole) and winter basket attachments (CHF 8) sold at Decathalon.

What to wear when snowshoeing
What shoes to wear with snowshoes
Snowshoes do not require specific footwear, unlike crampons that typically require a mountaineering boot (which I learned on our glacier trek). While you can hypothetically strap any walking shoe to a snowshoe, it’s best to wear waterproof hiking boots with high ankle to keep out snow and moisture. If you wore a low-profile shoe, lots of snow would flop into the shoe.
I wear these Meindl Air Revolution Ultra hiking boots (blue/grey below), which are very waterproof. My kids don’t have ankle hiking boots, so for snowshoeing they have been wearing their casual winter boots (black below), which are quite flexible and soft, not hiking shoes at all. They don’t seem to mind. I went snowshoeing once with my casual winter boots and it was ok and definitely warmer and more cozy. But I missed the sturdiness of my hiking boots. It just wasn’t quite as comfortable hiking on uneven terrain.

What clothes to wear for snowshoeing
Choosing your clothing for snowshoeing is the same as for a winter hike. You need to protect from the cold but as you hike, you can get quite warm and sweat, often needing to remove your outer jacket even on a cold day (as shown below). But when you aren’t climbing, your body temperature can drop quickly and you may need to add one or more layers to keep warm. So bringing a variety of layers is important.

Upper body. I like to wear a lightweight long sleeve base layer that breathes and a light down jacket. I also bring a fleece in my backpack in case I get cold. If it’s a particularly cold, windy day, I would probably also bring a windproof shell or a heavier winter jacket instead of the down jacket.
Lower body. The first few times I went snowshoeing, I wore my ski pants because I wanted waterproof clothing that covered my ankle, to prevent show from going into my shoes. But I got too warm and ski pants are a little bulky, making hiking a little awkward.
Some people we saw on the snowshoe trail were wearing thinner waterproof shells presumably over a thermal layer. I think that would be the ideal choice. I still think have a water/windproof outer layer is ideal. I also saw some wearing thick running tights, hiking trousers or jeans with gaiters to keep the snow out.
Gloves. Your hands can get quite cold since they have to hold the poles, not sit in your pocket. Instead of thick ski gloves, I prefer to use running or biking gloves (preferably windproof like these). But this is a matter of preference. While moving, I usually find that I’m warm enough that my hands don’t get that cold and just need a thin layer to protect from the elements. But if you tend to get cold hands, bring a thick waterproof glove.
Hat & scarf. If it’s sunny, you might prefer a ball cap instead of a winter cap. I usually bring both in my backpack in case conditions change. I usually bring a thin neck warmer in case the wind picks up.
Sunglasses & sunscreen. The sun is more intense when reflecting off the snow. So don’t forget sunglasses and sunscreen to protect your eyes and face, even on a partly cloudy day.
What to bring on a snowshoe hike
Snowshoeing is very similar to hiking, so you’ll need the same things. See our Hiking pack list for kids.
At a minimum, bring a backpack to store your layers and supplies. Bring at least a liter of water, or more depending on how far you hike. Bring snacks for energy. Bring cash in case you pass a mountain hut serving drinks. Bring your phone so you can contact people in an emergency.
If you are planning to hike in deep snow or anywhere that might have an avalanche risk, you should carry a shovel, probe and beacon and know how to use them. See the MSR Beginners Guide to Avalanche Safety.
Technique for snowshoeing
Snowshoeing is basically the same as walking, with a few basic techniques that are easy to learn. Below are a few things that are helpful to know when you first get started. Most resorts offer guided tours if you prefer a little help on your first time out.
When attaching the snowshoe, make sure your foot is not too far forward or too far back. Many snowshoes have a marking where the ball of your foot should be placed. Usually your hiking shoe should just peek over the area that has the main toe spike. This will give you proper leverage later on.
Strap down your shoes a little tighter than you think. You don’t want to slip around on top of the snowshoe. They should feel like part of your regular shoes.
Snowshoes have spikes under your toes. When you walk uphill, you can tilt your toes forward to dig these spikes into the snow/ice. This really helps with traction. If a hill is particularly steep, most snowshoes have a little bar under your heel that you can raise. This keeps the snowshoe flat against the snow, while your foot is raised like you are walking up stairs, with the toe spikes digging deep into the slope. This makes it easier and more comfortable to walk uphill.
Pay attention. We’ve fallen over just by getting distracted and stepping on our own snowshoes. Since they are wider than your regular feet, it takes a little practice to not knock your feet together without a little concentration.
Don’t walk backwards if you can help it. Better to do a small circle to turn around.
Safety while snowshoeing
Avalanches are one of the worst dangers for snowshoe hikers. In this SLF article on avalanche danger, they recommend that inexperienced hikers stick to official snowshoe routes, never hike alone, and check the avalanche and snow conditions before every hike. They also recommend taking an avalanche safety course if you plan to explore off official trails.
Stick to the trail. Because trails can be difficult to see, snowshoeing has a greater risk of getting lost. Every winter, there are reports of snowshoe hikers that simply never return. Experts advise that you follow marked routes.
I recommend downloading the snowshoe trail on your phone for offline use to help you stay on the trail. Since you are walking on snow, the only thing keeping you on track are other people’s footprints and the pink trail marker poles. Having a GPS map is an extra safety precaution, particularly in poor conditions.
With many online trail sources, you can download the GPX file and then upload it onto your favorite trail map app. I mostly use Komoot, which I find easy to use and reasonably accurate. I have also used AllTrails, Outdoor Active and the Switzerland Mobility app.
Join Rega. You should also join Rega, Switzerland’s helicopter rescue service. For a small yearly fee (CHF 40/person or CHF 80/family per year), if you need a Rega rescue, they can waive the costs not covered by your regular insurance, which can be thousands of francs. Well worth it! Then install the Rega app, which enables you to quickly communicate your GPS coordinates to the Rega team in case of emergency.
Guidelines for respecting nature
Although snowshoes allow you to easily walk off the beaten path, you should follow certain guidelines to respect nature and wild animals. In some snowshoeing areas, signs will warn you to stay on the marked path and not cross fields or explore off trail in the woods. The reason is to not disturb the habitat of wild animals that already have a tough time during winter finding food and shelter.
The “Respktiere Deine Grenzen” initiative suggests:
1. Respect designated wildlife areas and wildlife reserves (aka “Wildruhezonen” und “Wildtierschutzgebiete”). They provide wild animals with an undisturbed habitat.
2. Stay on paths and designated routes in the forest. This allows wild animals to adjust to the presence of humans.
3. Avoid forest edges and snow-free surfaces: this is where wild animals like to be best.
4. Keep your dog on a lead, particularly in the forest: wild animals run away from dogs running free.
See also:
I also found this REI’s Beginners Guide to Snowshoeing very helpful when we got started.


2 responses
Kandersteg Sunnbuel has a couple of nice snow shoe trails. Engelberg Trübsee trail is also very pretty. And Zermatt has some beautiful snowshoe trails also.
Great suggestions, thank you!