New to Switzerland? No experience hiking? No worries! Switzerland makes it so easy to hike, with well-built trails with clear signage. There are endless options for hikers of all ages and abilities, from toddlers to teens, from newbies to experts.
Below are tips for hiking in Switzerland for beginners, including the basics of how Swiss trails are organized, how to read the trail signs, and what to expect from different trail types.
See also Hiking with Kids in Switzerland for specific tips on taking your family on the trail.
1. What to expect of Swiss Trails
Swiss trails are generally well marked, well maintained and free hiking maps are usually available on site. Most resorts have short, easy panorama trails for casual walkers. Most resorts have designed family-friendly trails with playgrounds and themes to keep children engaged and happy.
Many resorts have a least one “obstacle-free” path, meaning it is smooth dirt/gravel or paved and accessible for strollers and wheelchairs.
See also How to pick the right hike for you
2. Reading Swiss trail maps
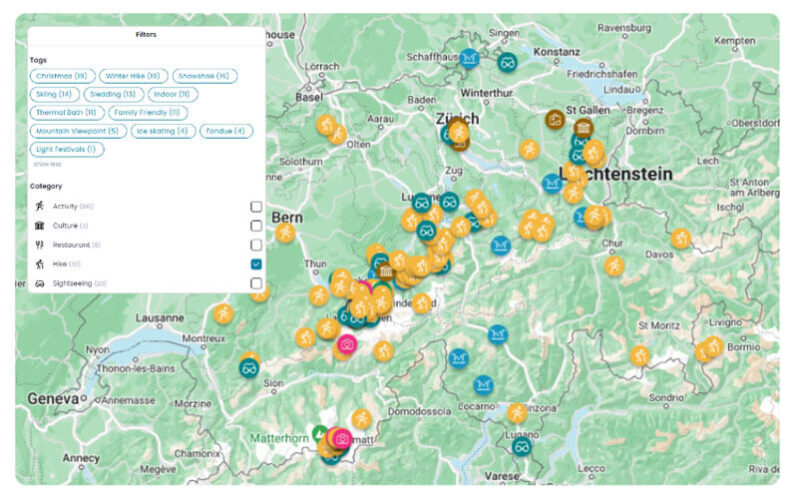
Most mountain areas provide free summer hiking maps, which give an overview of the trails, as shown below. Map markings vary but each map usually gives a legend.
Trails are usually marked with a symbol so you can differentiate between hiking and bike paths. Trails are sometimes color coded for difficulty. Mountain transport usually has an icon to show weather it’s an enclosed cabin or open chair lift. Extras like restaurants, hotels, huts, picnic areas and playgrounds are marked with symbols.

If you want a more accurate technical hiking map, you can often buy these at the lift ticket office or at a sport store in the area.
I usually download the GPX trail map on my phone. I use Komoot, SchweizMobil and OutdoorActive mobile apps.
3. Swiss trail signs
Here’s what the trail signs look like. Official trail signs are yellow as shown here. The signs usually quote hiking time, not distance. The wine glass icon means you’ll find a restaurant at that destination. The bus, train or gondola symbol means you can catch public transportation there.

A full yellow sign means a walking path, usually a relatively smooth dirt path.
The white/red/white stripe means “mountain trail,” which usually means a narrow dirt path, with rocks and obstacles. Mountain trails are typically well marked and maintained either by the resort, village, or local hiking clubs. It doesn’t necessarily mean the trail is difficult.
The white/blue/white stripe means “alpine trail,” which is for experienced hikers only. Alpine trails are often not well marked with a faint path that may be difficult to see, best to bring a navigation device with you. Alpine trails usually have exposed sections with ladders, chains or other obstacles to navigate. You may need special climbing and/or safety equipment on these trails.
Learn more about Swiss hiking trail categories.
Official named hiking routes are color-coded and numbered, like #2, #4 and #98 shown below. Details for these routes can be seen on SchweizMobil.ch.

4. Swiss trail markers
Trails are generally well marked in Switzerland. You’ll either see yellow diamonds or white-red-white stripes painted on stuff. Remember that yellow means an average walking path and red/white means a more difficult mountain trail. Other countries use different colors, so don’t get confused.

5. How to get to the Swiss mountains – car, train & bus
For most hikes, you can easily drive or take public transport to practically every mountain and trail in Switzerland.
For most large well-known mountain areas, roads are well maintained for driving and there are always parking lots near the cable car stations, though many require a small fee so remember to bring coins for the meter (usually about CHF 5-8/day). For smaller mountain areas, you may need to drive on a narrow winding mountain road to reach the lift and hiking area. Check the maps and road conditions before heading out.
Buses usually drop off directly at the cable car station. Remember to check the bus or train schedule before leaving the house, in case certain connections are not running on that day due to maintenance or special events.
SponsoredDiscover top exclusive offers today!
Click here to learn more and take advantage of these limited-time deals.
For one way trails, there is almost always public transportation to take you back to your starting point instead of shuttling cars back and forth with friends. I recommend doing the shuttle before your hike so you don’t have to worry about catching the bus at a specific time at the end of your hike.
6. Using mountain railways for hikes
Most mountain towns have a cable car, chair lift, or mountain train to carry you up the mountain so you don’t have to hike up to get the views.
Most mountains open for summer season around mid June through mid October. They may open earlier in April or May, but maybe only on weekends or holidays.

Most mountain transport opens around 8:00 and closes about 17:00. At smaller resorts, lifts often close over lunch time from around 12:00 to 13:00. Make sure to time your hike so you don’t miss the last lift down the mountain (read our hiking fail when we did miss it).
In every case, check the mountain website beforehand for the operating times. There can be closures for bad weather or special events.
Prices vary widely, anywhere from CHF 10 to CHF 200. Most Swiss hikers have a SBB Half-fare card, which give a 50% discount on most mountain transport as well as public transport. See more budget tips.
On a budget? See Best Swiss Hikes without a cable car
See also 10 Crazy Cars in Switzerland
7. What to pack for a Swiss hike
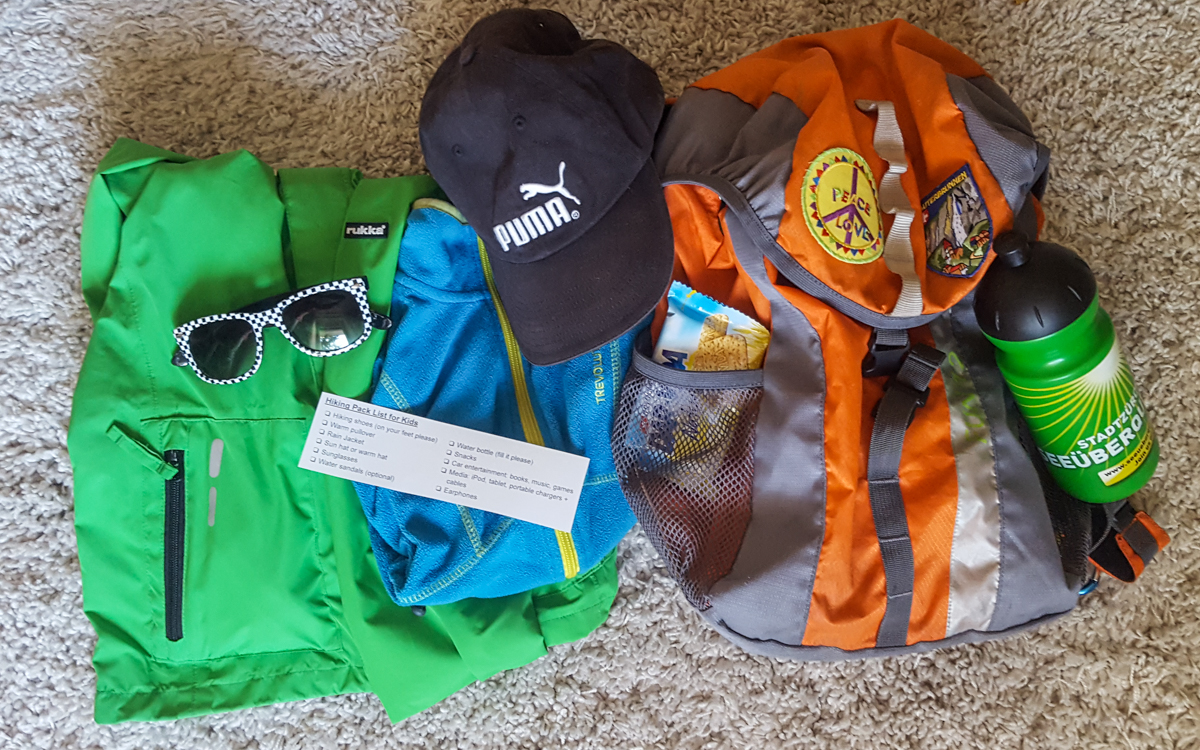
Most Swiss mountain areas are not far from civilization. So you don’t need to take a lot with you and you can usually buy essentials you forgot in the mountain village, including food and sometimes clothes. But you should always take water and snacks and a few supplies to make your trip more comfortable.
See our Hiking Pack List for Kids
8. What to wear when hiking in Switzerland
As with any hike, you need to wear appropriate clothing for the weather and conditions. Since weather can change quickly in the mountains, it’s important to pack layers even if the weather looks sunny and hot. We often start hikes in shorts and sun hats and end with coats and mittens.
You don’t necessarily need expensive, technical clothing. We think it’s more important to be comfortable than wear special hiking clothes, especially for kids. But it is important to have sturdy shoes and a good rain jacket.
For details, see What to wear on a Swiss hike

9. Where to eat on a Swiss hike
You don’t necessarily have to bring a lot of food because most mountain areas have at least one restaurant either near the cable car station or along the trail. Mountain huts along the trail that serve simple meals and often expect you to pay cash. Check the website and hiking map for each locations and opening times.

If you prefer to bring food, many trails have official picnic areas with fire pits, including a grill and wood. These are usually clearly marked on the hiking maps. In addition, you can usually build a fire anywhere along the trail unless explicitly restricted in a nature preserve or because of fire danger in a dry area. In these cases, you will see sign telling you fires are forbidden.
See also Swiss Guide to Hiking Food and What to Grill on the Trail
10. Important hiking terms in German
Here are a few terms that will help in the German-speaking Swiss alps.
- Wanderweg – walking path
- Rundgang – loop trail
- Lehrpfad – educational path, the trail will have info signboards along the trail
- Feuerstelle – picnic area with fire pits, usually with wood
- Bergbahn, Seilbahn – cable car or gondola
- Bergstation – mountain cable car station
- Talstation – valley cable car station
- …hütte SAC – means a mountain hut with the SAC affliation (more about mountain huts).
- Schutzgebiet – nature reserve, hiking, fire, and/or picnics may be restricted in that area
- Hunde an der Leine führen – dogs must be on a leash, required in certain nature preserves
Still not convinced? See 10 ways to enjoy the Swiss alps without hiking


4 responses
I didn’t get one thing. The red & white stripws means alpine trail, but that doensn’t mean it is difficult (that is the blue & white ones). But on the swiss trail markers, the white/red means dificult mountain trail. So the same colored pattern doens’t mean the same thing?
Thanks for your feedback. I should update this post to be more clear. The “White Red White” stripe corresponds to a “mountain trail” (not alpine trail) which generally means a trail that is well marked and maintained, but typically includes uneven terrain on a narrow path. The “White Blue White” stripe corresponds to an “alpine trail” which is for experienced hikers only, with exposed sections that may require special safety equipment for climbing. You can learn more at https://www.schweizer-wanderwege.ch/de/wissen/signalisation/wegkategorien
What is meant by the hiking time measure shown on trail signs as “Std”? E.g. “1 Std 15 min”
“Std” refers to “Stunde” which is the word for “hour” in German. So that is 1 hour 15 mins.